Building an Interactive 3D Multiplane Engine
Transform static 2D layers into a dynamic, interactive 3D environment. This project demonstrates how to use Three.js to create a multiplane camera effect, similar to traditional animation techniques used by Disney, but with a modern web twist.
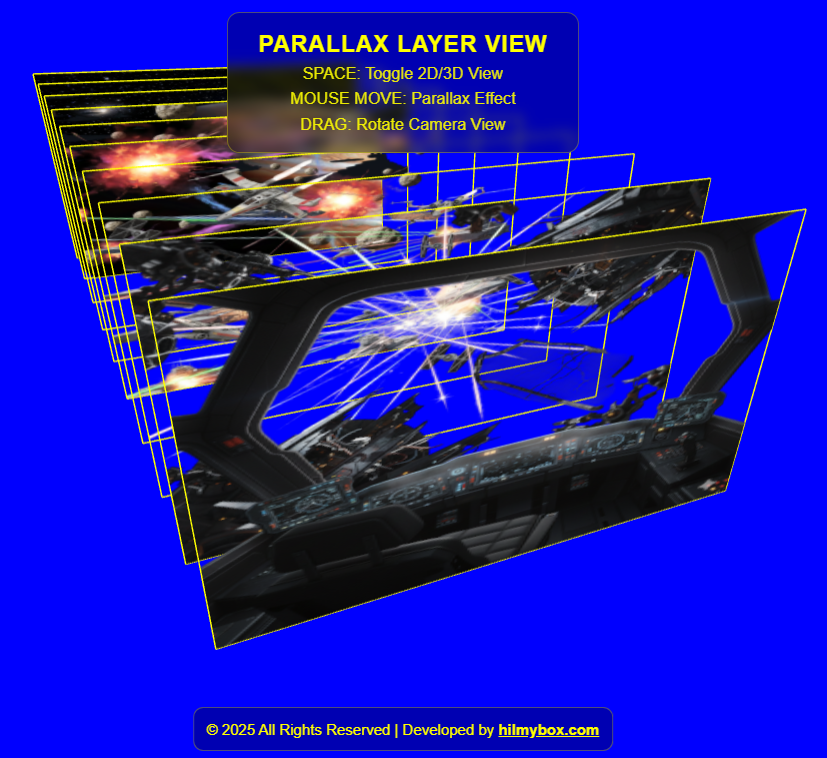
The engine features a custom-built parallax system that reacts to mouse movement, a seamless transition between 3D perspective and 2D "stacked" views using GSAP animations, and a high-contrast "Blue Screen" interface with yellow technical outlines for a distinct "production-suite" aesthetic.
Click here to access.
1. The Core Engine
The core of this application is driven by Three.js, a high-level JavaScript library that acts as a wrapper around WebGL.
- Scene Graph Management: The engine maintains a
THREE.Scenewhere it manages 10 distinctPlaneGeometryobjects (layers). - Animation State Controller: It uses GSAP (GreenSock Animation Platform) for its state transitions. While Three.js handles the rendering, GSAP acts as the "brain" for movement logic, calculating the interpolation between the "Stacked" (2D) and "Exploded" (3D) positions.
- The Render Loop: The
animate()function serves as the heartbeat, constantly updating positions and firing therenderer.render()command to refresh the screen.
2. Rendering Technology
The project utilizes Hardware-Accelerated WebGL via a WebGLRenderer. Unlike CSS-based 3D, this taps directly into the user's GPU (Graphics Processing Unit).
- Texture Mapping: Each layer is a
MeshBasicMaterialwith aTextureLoadermapping a PNG file. It usesalphaTestandtransparent: trueto handle complex transparency within the image files. - Alpha Blending and Render Order: A crucial technical detail is the
renderOrderanddepthTest. When layers are stacked (Z=0), the engine must manually define which layer is on top to avoid "Z-fighting" (where the GPU doesn't know which pixel to draw first). - Edge Rendering: It uses
EdgesGeometryto draw yellow wireframes around each plane, helping the user perceive the spatial boundaries of each art layer.
3. Mathematical Tools
The "Parallax" effect is achieved through Normalized Device Coordinates (NDC) and Linear Interpolation.
- Coordinate Normalization: The mouse position is mapped from pixels to a range of -1 to +1:

- Coefficient-Based Offsets: Each layer is assigned a
factorbased on its index: (layerCount - index) *0.35. Layers further back in the stack have a higher factor, causing them to move "faster" or "further" relative to the mouse, creating the illusion of depth. - Smoothing (Easing): The code uses a simple lerp-style smoothing formula:plane.position.x += (targetX - plane.position.x) * 0.05;This ensures the movement isn't robotic; it has a slight "weight" or delay as it follows the mouse.
4. Front-End Environment
The environment is built as a Modern ES Module (ESM) web application.
- Import Maps: It uses a
<script type="importmap">to resolve dependencies. This is a modern browser feature that allows you to useimportstatements for external CDNs (like Skypack and Unpkg) without a build tool like Webpack or Vite. - Responsive Viewport: The environment listens for the
resizeevent to update thecamera.aspectratio andrenderer.setSize, ensuring the 3D scene doesn't stretch on mobile or ultra-wide monitors. - UI/UX Layer: A standard HTML/CSS overlay is used for the control panel. It uses
backdrop-filter: blur(5px)for a modern "glassmorphism" look, whilepointer-events: autoensures the buttons remain clickable over the 3D canvas.